Powering the Cut: How to Select the Right Lawnmower Battery

When you have a relatively large yard, you need an equally efficient lawnmower. Many people invest in a riding mower or similar model to get the job done. That top-of-the-line tool isn’t going to travel too far without the proper lawn mower batteries. Learn all about the details that go into making a garden battery. You’ll feel like an expert during your next purchase.

1. Sizing the Power Source

Access the riding lawn mower battery under the seat, and you’ll realize that there’s not much wiggle room. The proper battery will fit right into the manufacturer’s original housing. To make your decision easier, consult with the manufacturer’s instructions for your particular lawn tractor. It will often have suggestions that narrow down your choices.

A clever way to size the next battery is by taking the old one with you during a shopping excursion. Match the size at the store, or even ask the front-counter person about a similar model. Our Northeast Battery team can help you with installation tips, for example.

2. Verifying the Voltage Level

Advance Auto Parts reminds their readers that lawn mower batteries are normally rated at 12 volts. This rating may seem low, but it’s really all the power that garden tractors require. Avoid the addition of a battery with extra voltage. It won’t help the circuitry or power the mower for a long period of time. In fact, excessive power will only damage the electrical system.

Each battery should have a clear label that indicates the voltage level. It often says lawn and garden on the battery too. Use this information as you select the proper power source for your tool.

3. Examining the Cold-Cranking Amps

When it comes to powering up your engine, the current coursing through the lawn mower battery is crucial to success. Shop around for the CCA or cold-cranking amps value advertised on every battery. This value should match the mower’s specifications regarding the electrical systems.

Ideally, look for a CCA that meets or exceeds the manufacturer’s specs. You’ll be able to turn over the engine without hesitation.

Avoid CCAs that are too low for your tool. The battery might work as a temporary measure, but it will decline at a rapid pace. It makes more sense to pay a bit extra for the proper CCA rating.

4. Understanding Terminal Positioning

You might be accustomed to automotive batteries that have fixed terminals regardless of the style. Mower batteries are different, however. Look for a Group U1L battery when your positive or red terminal is in the left-hand corner. In contrast, Group U1R batteries locate the terminal on the right-hand side.

Their positions aren’t important for the lawn mower battery charger, but they are critical for connections into the electrical systems. You want the wires extending from the battery and into the mower to be relaxed. Don’t stretch them to fit an improper battery. Electrical problems will plague the mower.

5. Getting Ahead With Extra Batteries

A riding lawn mower battery should have enough power to take on the average yard. However, battery age and large properties can add up to a lack of power. Select proper replacement batteries by buying more than one at a time.

Purchase a pair of batteries so that you always have extra power in case of power loss, suggests Popular Mechanics. Swap the batteries in and out of the tool so that a lawn mower battery charger can do its work. If you ever encounter a dead battery, you have the necessary power to finish the job.

For all of your lawn and garden questions, contact Northeast Battery today. From cranking amps to voltage levels, these specifications can be simplified with just a quick discussion about your lawn mower battery. Trim the grass in record time so that you can relax this summer. The right battery will prove to be a reliable tool in the yard.

Five Steps to Take If You Think Your Lawnmower Battery is Dead

Picture your lawn after a week or longer of no mowing. It’s a jungle out there! You hop on your lawnmower, and it’s dead in the water. This frustrating scenario occurs to almost every homeowner at some point in life. Get to know the signs that your lawn tractor battery is dead. The clues will point you in the right direction.

1. Check the Connections

Lawn mower batteries deal with a lot of vibrations. In fact, the vibration can lead to rapid decline in the power source. This fact tends to make any battery a drawback to a mower in the first place, reports Quicken Loans. However, you can overcome this issue by checking the battery on a regular basis.

Lift up the seat on a riding mower to access the lawn mower battery. Give the wires a gentle pull. If any of them are loose from the battery’s terminals, tighten them up as necessary. All electrical systems rely on solid connections or else the electricity cannot reliably flow. In some cases, it’s just a wire issue that solves the power dilemma.

2. Try a Charging Session

Connect your questionable battery to a lawn mower battery charger. Set it for 12 volts, which is the standard in the industry. Most lawn and garden devices have this voltage rating as a way to keep consumers safe from any shock.

Allow the charger to power up the battery for up to eight hours. It should have a full charge by this time. If you notice that it’s still indicating a low status, it’s time to replace the battery. The cells can’t absorb the electrical energy as well as they used to do. Working with the same battery won’t improve the situation.

3. Listen for a Clicking Sound

Starting up your lawnmower can tell you a lot about its health. Grab the pull cord or turn the key in the ignition. If you hear a clicking sound, replacement batteries are probably in your future.

The motor is trying to draw power from the battery, but it’s not receiving enough juice. Proper maintenance on the batterycan prolong its lifespan, but it will decline in time. Swap out the battery and try the power-up sequence again. In most cases, the problem is now solved.

Treat your new battery to regular maintenance now so that it can last for as long as possible. Place it on a trickle charge when you aren’t using the mower over long periods of time, such as over the winter months. You’ll see a marked difference in performance time and lifespan length.

4. Verify the Voltage

You may be questioning the mower’s electrical system, including the use of a lawn mower battery charger. Put your concerns to rest by pulling out a multimeter. Set the device to DC or direct current.

Attach the meter’s probe to the battery’s terminals. Match the positive lead to the red terminal, and connect the negative lead to the black terminal on the battery. Garden tractors usually have around 12 volts on a healthy battery.

Other voltages might arise on your system, such as:

  • 12.7 volts
  • 11.5 volts

Keep the battery if it reflects 12.7 volts, but replace it at 11.5 volts. Although your battery might have light indicators that denote charging levels, states Consumer Reports, a multimeter will always give you a better indication of battery health.

5. Examine the Water Reservoir

Lawn mower batteries usually have a flooded design where you add water for maintenance purposes. Check your battery by accessing the reservoir. It should be filled to the maximum level. If it’s low on water, that may be your only problem. Fill it and test the mower again.

For any questions about your lawn mower battery, contact Northeast Batterytoday. Our team can troubleshoot any battery. Put your mower back on a productive path with quality batteries from our inventory. Your landscape can shine brightly once again!

How to Install Lithium Batteries on a Sailboat

Running any power-related device on a sailboat used to require lead-acid batteries. Hauling these heavy batteries around was your only choice.

With battery and solar options evolving every day, however, you have more choices than ever before when it comes to power resources. Lithium batteries for a boat is the latest trend. It’s gaining momentum for good reason. Discover the details surrounding the lithium ion boat battery and installation tips. You’ll never turn back to lead-acid batteries again.

Considering the Major Benefits

Before you install lithium boat batteries, understanding their benefits is a must. Lithium technology doesn’t produce fumes like lead-acid batteries, which can be hazardous when you’re exposed to them over long periods of time.

Several other benefits are inherent to the battery’s internal chemistry, such as:

  • Significant weight save on the vessel
  • Rapid power absorption from a proper battery charger

Fire safety is always a concern on a sailboat, and lithium batteries are incredibly safe. They rank much better than their lead-acid relatives, states Gone With the Wynns.

Choosing Manufactured or DIY Banks

You have a choice when it comes to installing a lithium ion battery on your sailboat, such as:

  • Engineered products
  • DIY or homemade battery banks

If you have a technical background, you can string together individual batteries to make your own bank. Always test it before adding the bank to your sailboat, however.

Most captains opt for the engineered batteries that are carefully balanced at the manufacturing facility. These products can then be matched to your power system and adjusted as necessary, reports Nordkyn Design.

Looking to Lead-Acid Equivalents

Battery manufacturers are always looking for shortcuts that benefit consumers. Lithium boat batteries that are advertised as lead-acid equivalents are attractive. They look like exact swaps for your lithium upgrade.

Use caution if you choose these products. Their voltage and current can exceed the rating for your sailboat. By choosing an equivalent, you take on the task of matching the ratings as carefully as possible.

Be sure that the current doesn’t rise above the sailboat’s maximum values. The battery may break down, or the system receives the brunt of the damages. If you’re unsure of the technology, opt for other options for your vessel.

Prioritizing the Battery Management System

As you add the batteries onto your vessel, be sure to incorporate a protection system into the design. A battery management system or BMS protects the cells from harm, such as:

  • Excessive temperatures
  • Out-of-spec currents and voltages

Although a BMS is an additional installation step, consider it a mandatory accessory. You’ll increase the life on the batteries so that you aren’t recycling the productsshortly after their purchase.

Managing the Battery’s Use

Install lithium technology with a high amount of usable amp hours. They might be as high as 240 A-h, for example. Your vessel will have enough power to activate multiple items at once over a long period of time.

Lithium technology can also be discharged to astoundingly low rates. Lead-acid batteries will break down in rapid time when discharges drop below 50 percent. Remember to charge the batteries, and run them down as far as possible. They’ll last much longer as a result.

Adding Extra Banks

Lithium batteries for a boat have reliable power, but you have a unique system. You might have a lot more items to power up compared to other vessels. Consider an installation that involves three or four banks of batteries. Split the power between your accessories and the motor or generator.

With additional banks, the sailboat can run almost entirely off of lithium energy. Carrying propane or other fuel isn’t required anymore. The vessel remains lightweight and agile in the water.

Get to know your lithium ion boat battery options with a call to Northeast Battery. Our collection of boat batteries can solve most of your sailboat-power dilemmas. Head out to sea with safe, lithium technology. You’re in control of your power volume.

Trojan T-105 and T-875: The Only Golf Batteries You Need


As the world leader of engineering deep cycle batteries, Trojan plays an essential role in curating the golf experience.

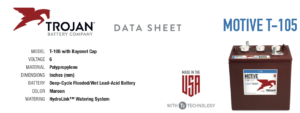
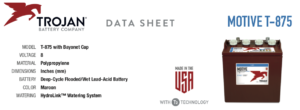
When new technology evolves, Trojan is there. The Trojan T-105 and T-875 motive batteries are part of the backbone of Trojan’s deep-cycle flooded batteries. The T-105 (6V) and T-875 (8V) are perfect for a number of different golf and electric vehicles, ensuring you get superior performance out on the course.

Get your quote today, or simply ask our team a question about which option is the best fit for you.

Get All the Specs: Trojan T-105 Data Sheet


Experience Trojan T2 Technology ™

Trojan’s T2 Technology stands upon three pillars of engineering:

  1. Maximum, consistent performance
  2. Longer lifetime
  3. Increased total energy

T2 gives all Trojan deep-cycle batteries much-needed durability and performance, ideal for golf applications. Because deep-cycle flooded batteries are a cornerstone of Trojan’s product suite, they need to provide more than just great performance. That’s why these batteries deliver consistently outstanding performance.

Golf carts need reliability – its a non-negotiable when it comes to choosing a battery to power your vehicle. T2 Technology provides that reliability, while also delivering that increased total energy.

It’s always a good time to switch to a better battery. Get yours today!